Leather bags are not just accessories; they are investments that age gracefully with proper care. However, scratches—whether from daily use, accidental bumps, or friction—can mar their appearance and leave owners frustrated. The good news is that most minor scratches can be repaired at home without causing further damage. This guide will walk you through the process of how to remove scratches from leather bags, from understanding the before-and-after of minor scratches to mastering the right tools and techniques.
Understanding Minor Scratches: Before and After
Before diving into the repair process, it’s crucial to distinguish between minor and deep scratches, as this determines the approach. Minor scratches are surface-level imperfections that affect only the top layer of the leather (the finish or dye) without penetrating the underlying material. They often appear as faint, lighter lines or discoloration, especially on pigmented or finished leather.
- Before Repair: A minor scratch disrupts the leather’s smooth surface, reflecting light unevenly. On dark leather, it may show up as a lighter streak; on light leather, it might look like a darker, slightly raised line. The texture around the scratch remains mostly intact, and the leather itself feels firm to the touch.
- After Repair: When treated correctly, the scratch should blend into the surrounding leather. The surface regains its uniform texture, and the light reflection becomes consistent, making the scratch nearly invisible. The key here is that the leather’s natural suppleness and color remain unchanged—only the imperfection is addressed.
It’s important to note that deep scratches, which expose the raw, undyed leather beneath, require professional intervention. Attempting to fix them at home with basic tools can worsen the damage. For the scope of this guide, we’ll focus on minor scratches, where knowing how to remove scratches from leather bags is both feasible and effective.

Essential Tools for Safe Scratch Removal
Using the right tools is half the battle when learning how to remove scratches from leather bags. Avoid harsh chemicals, abrasive materials, or sharp objects, as these can strip the leather’s finish, fade its color, or create new damage. Here’s what you’ll need:
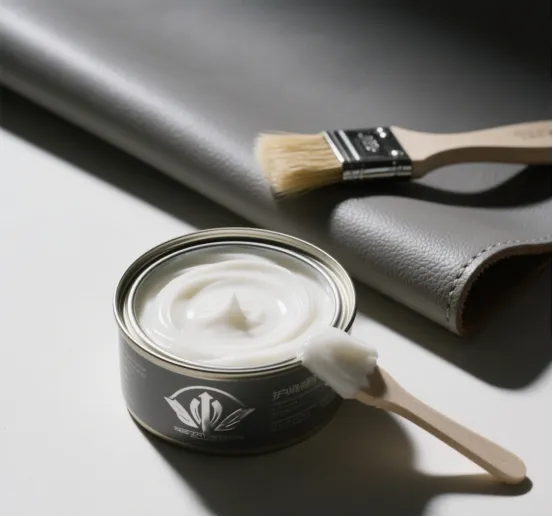
- Leather Conditioner: A high-quality, pH-balanced conditioner softens the leather, making it more pliable and helping to reduce the appearance of shallow scratches. Look for products with natural ingredients like beeswax or jojoba oil.
- Leather Dye or Polish (Matching Color): For scratches that have lightened the leather’s color, a matching dye or polish can restore uniformity. Test it on an inconspicuous area (e.g., the inside of the bag) first to ensure it doesn’t alter the shade.
- Microfiber Cloth: Soft and lint-free, microfiber cloths are ideal for applying products and buffing the leather without scratching it further. Avoid using paper towels or rough fabrics, which can leave lint or cause additional abrasions.
- Cotton Swabs: These are perfect for precise application of dye or conditioner on small, targeted areas, such as narrow scratches.
- Hairdryer (Optional): A hairdryer set to low heat can speed up the drying process of conditioner or dye, but it must be used carefully to avoid overheating the leather.
Step-by-Step Guide: How to Remove Scratches from Leather Bags
1. Prepare the Leather Surface
Before attempting to remove the scratch, the leather must be clean and free of dirt, oils, or debris. Dirt trapped in the scratch can interfere with the repair process and may cause discoloration when mixed with conditioner or dye.
- Gentle Cleaning: Dampen a microfiber cloth with lukewarm water (avoid soaking the leather) and gently wipe the area around the scratch. For stubborn dirt, add a drop of mild, pH-neutral soap to the cloth and rub it into a lather before dabbing at the dirt. Never pour water directly onto the bag or scrub aggressively, as this can warp the leather or strip its finish.
- Drying: Allow the cleaned area to air-dry completely. Patting it lightly with a dry microfiber cloth can speed up the process, but avoid using heat sources like radiators, as extreme heat can dry out the leather.
2. Assess the Scratch and Choose the Right Product
Once the leather is clean and dry, examine the scratch closely. For very faint scratches (where the leather’s color is intact but the surface is slightly uneven), a leather conditioner may be sufficient. For scratches that have lightened or discolored the leather, a matching dye or polish will be needed.
- Conditioner for Faint Scratches: Conditioner works by moisturizing the leather, causing it to swell slightly and fill in the scratch. This is most effective on full-grain or top-grain leather, which has a natural ability to absorb moisture.
- Dye/Polish for Discolored Scratches: If the scratch has removed some of the leather’s dye, a small amount of matching dye or polish will help restore the color. Choose a product specifically formulated for leather, as generic dyes can bleed or damage the material.
3. Apply the Product with the Correct Technique
The way you apply the product is just as important as the product itself. Rushing or using excessive force can lead to uneven results or further damage.
Using Conditioner:
- Squeeze a pea-sized amount of conditioner onto a clean microfiber cloth.
- Rub the cloth between your hands to warm the conditioner, which helps it absorb better.
- Gently buff the scratch in circular motions, applying light pressure. Focus on the scratch itself but blend the conditioner into the surrounding area to avoid creating a noticeable “patch.”
- Continue buffing for 30-60 seconds, then let the conditioner sit for 10-15 minutes to absorb.
- Wipe away any excess conditioner with a dry microfiber cloth.
Using Dye/Polish:
- Dip a cotton swab into the dye or polish, then blot it on a paper towel to remove excess (this prevents dripping and uneven application).
- Dab the swab lightly onto the scratch, working in small, controlled motions. Avoid spreading the dye beyond the scratch unless necessary for blending.
- Let the dye dry for 5-10 minutes, then check the results. If the scratch is still visible, repeat the process with a second thin layer (thick layers can crack or peel).
- Once satisfied, buff the area with a dry microfiber cloth to smooth the surface and remove any excess dye.
4. Finish with Buffing and Inspection
After applying the product, let the leather dry completely (this can take 1-2 hours, depending on the product and humidity). Once dry, use a clean microfiber cloth to buff the area in gentle circular motions. This step helps blend the treated area with the rest of the bag and restores the leather’s natural shine.
Inspect the scratch in natural light—this will give you the most accurate view of the results. If the scratch is still faintly visible, repeat the process with a second application of conditioner or dye. Remember, patience is key: multiple thin layers yield better results than one thick layer.
Leather Bag Care Tips to Prevent Future Scratches
While knowing how to remove scratches from leather bags is valuable, preventing scratches in the first place is even better. Here are some simple tips to keep your leather bag looking its best:
- Store Properly: When not in use, store your leather bag in a dust bag (preferably cotton, not plastic, which traps moisture) and stuff it with acid-free tissue paper to maintain its shape. Avoid stacking heavy items on top of it.
- Avoid Rough Surfaces: Be mindful of where you place your bag—rough surfaces like concrete or unpolished wood can cause scratches. Use a bag hook or a clean surface when setting it down.
- Regular Conditioning: Moisturized leather is less likely to scratch, as it remains supple and resistant to cracking. Condition your bag every 2-3 months (or more often if used daily) to keep the leather healthy.
How to Clean Leather Bag: A Quick Note
Regular cleaning is part of leather bag care, but it’s important to do it correctly to avoid scratches. Use a soft brush to remove surface dust weekly, and wipe spills immediately with a dry cloth (avoid rubbing, which can spread the spill and damage the leather). For deeper cleaning, use a leather-specific cleaner once every few months, following the same gentle techniques outlined earlier.
Conclusion
Learning how to remove scratches from leather bags is a skill that can extend the life and beauty of your favorite accessory. By understanding the difference between minor and deep scratches, using the right tools, and applying products with care, you can restore your bag’s appearance without causing further damage. Remember, leather is a natural material that responds well to gentle treatment—patience and consistency are key. With these techniques, your leather bag will continue to look elegant and timeless for years to come.


 ProductsExperience the best selection at Baliya. Our leather bags and goods exude quality and charm. Inquire now for exclusive deals and custom quotes!